POCOPOCO JOURNAL
Where to measure gauge: count stitches and rows in the centre
Leave the edges out, and count stitches across and rows up separately. A small routine for comparing your swatch with the pattern without stretching the fabric.
About a 3-minute read
Using the same yarn and tools does not give everyone the same fabric size. Gauge describes how many stitches and rows fit within a stated distance. A swatch is a small sample for checking those numbers in your own work. These basics concern measuring flat fabric. Follow the specific directions for work in the round, complex patterns or any other method your pattern requires. Begin by keeping a comparable record, rather than stretching the fabric to produce the number you want.
Check what to measure and in what condition
Read the gauge section for the yarn, tool, stitch pattern, measuring distance and finishing condition. Knitted stockinette and a crochet stitch pattern are different conditions. Check whether the stated gauge is before or after washing or blocking, the process of shaping and setting the fabric. Follow the pattern and yarn care instructions for any required treatment. If measurement is required after drying, let the swatch dry thoroughly. One water temperature or steam treatment is not suitable for every fibre. Use centimetre markings for a 10 cm specification and inch markings for a 4-inch specification; do not mix units along the way.
Make room around the measuring area
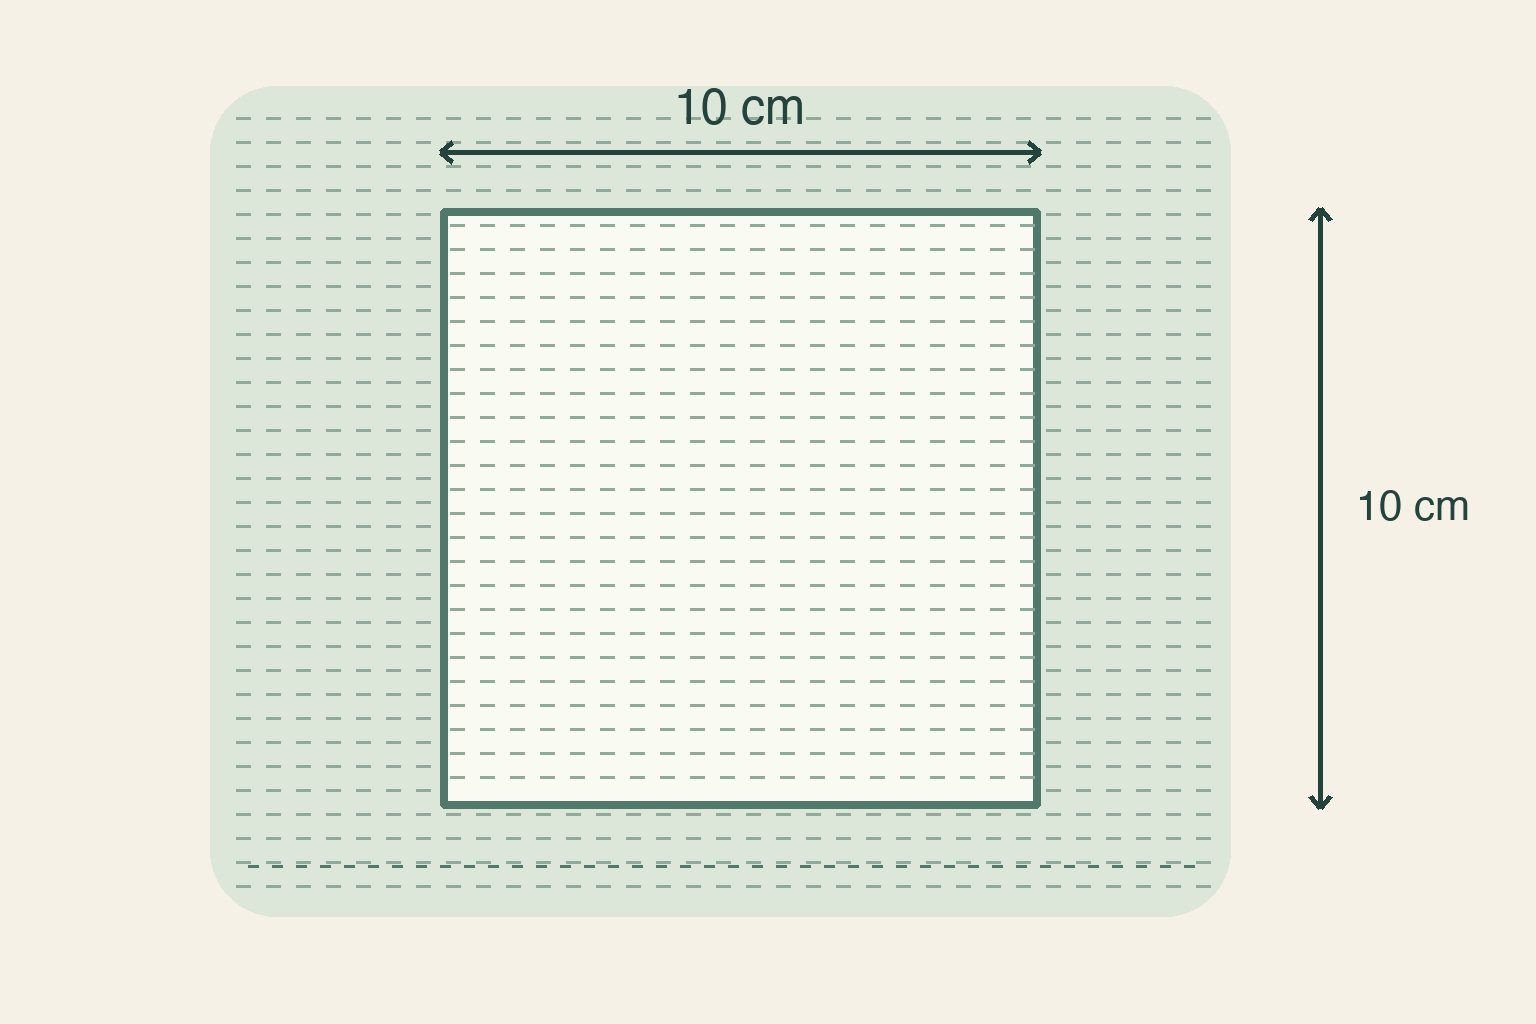
If the measuring span is 10 cm, a swatch only 10 cm wide from edge to edge cannot provide a central span that excludes the edges. Make the sample large enough to leave fabric around the area you will measure. Edge stitches and the beginning and ending rows can differ from the centre. Place the swatch on a flat surface, smooth it without pulling, and position the ruler in the middle. If the required span will not fit there, make a larger sample rather than stretching a smaller one. The window in the illustration shows placement; it is not an actual-size ruler to print and use.
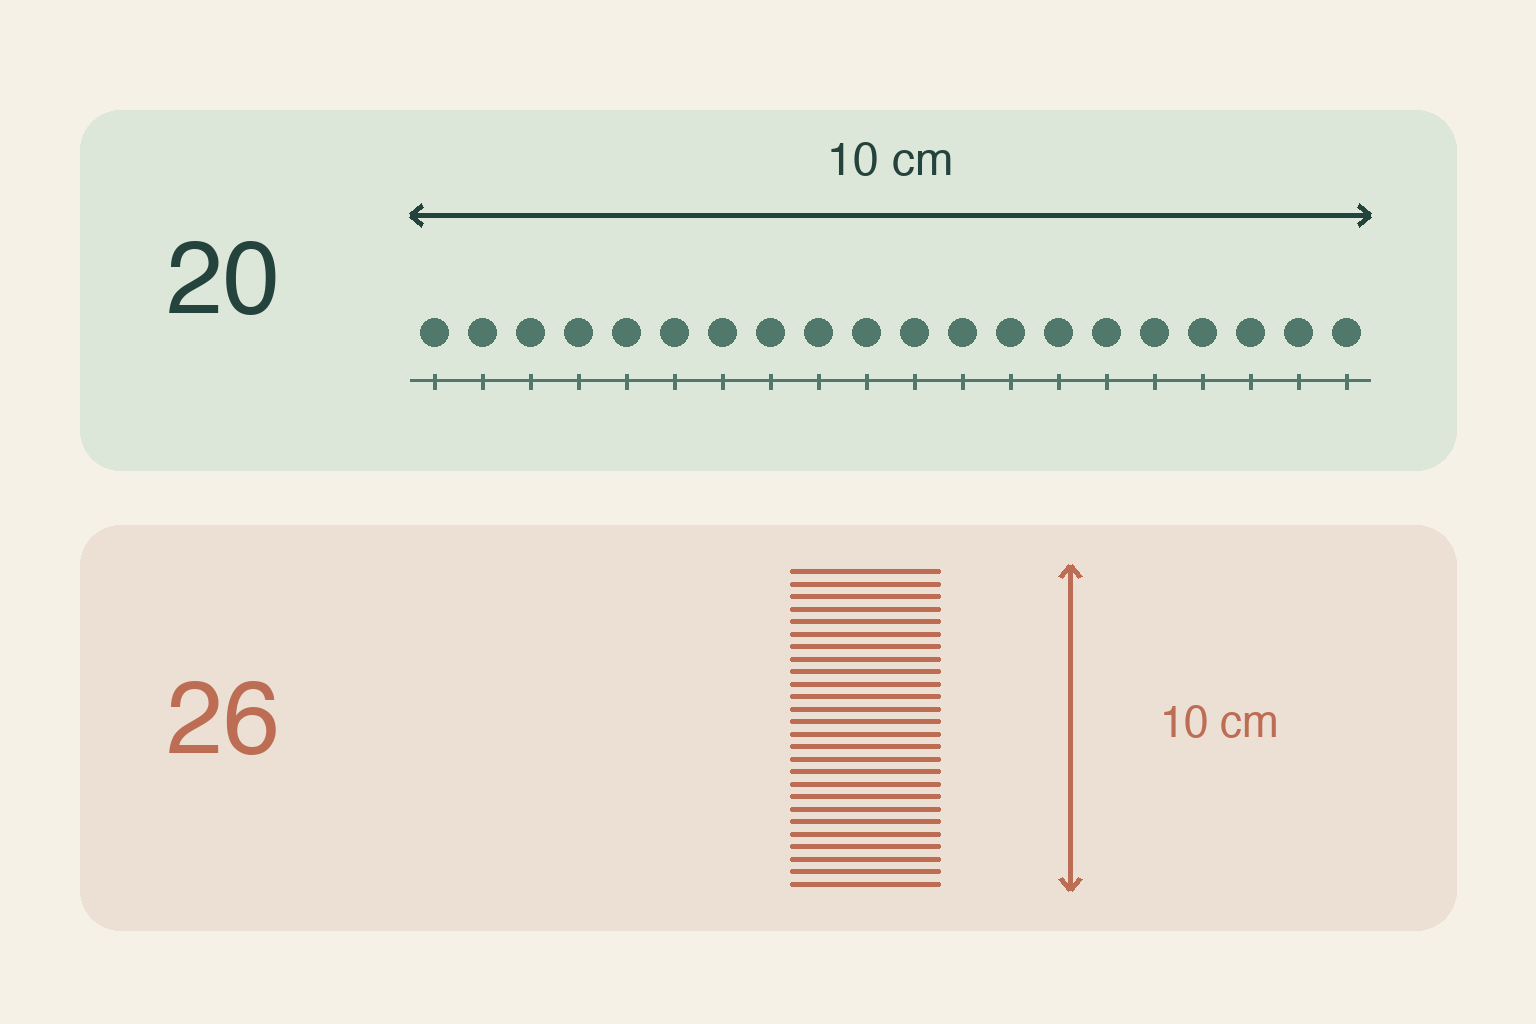
Original counting schematic by PocoPoco. Twenty stitches across 10 cm and 26 rows up 10 cm are illustrative examples. They do not depict actual stitch shapes, measured results or a universal target for every fabric. Count stitches across and rows up separately
Across the fabric, count the stitches within the specified distance. Vertically, count the rows within the specified distance. For an example gauge of 20 stitches and 26 rows over 10 cm, compare the horizontal 10 cm stitch count with 20 and the vertical 10 cm row count with 26. Do not add the two numbers or use the total stitch count of the entire swatch. These are illustrative numbers, not targets for every yarn or stitch pattern. If the measuring span ends partway through a stitch, record the fraction you can identify instead of rounding to a convenient whole number. Consult the pattern if you are unsure how a repeat is counted.
Compare like conditions before choosing the next check
Suppose the pattern asks for 20 stitches across 10 cm but you count 22. More stitches occupy the same width; this does not mean that the 22-stitch sample is wider. First recheck the units, location, stitch pattern, finishing condition and counting. If you then adjust a tool size or another condition, measure a new swatch and record the tools beside the results. Matching the horizontal count does not establish that the vertical count matches, so keep both measurements. This single check cannot guarantee the finished project's dimensions or fit. If a recheck still shows more stitches across the same width than the pattern specifies, try a larger size of the knitting needles or crochet hook you are using; if there are fewer stitches, try a smaller size. Make a new swatch after changing tools, and remeasure both stitches and rows under the pattern's stated conditions.